4.8 Hours –
I was hoping that I would be able to get the static ports installed today, but FedEx didn’t show up with my order from Van’s in time. The order had a couple of small sealant kits in it, one of which was going to be used for installing the static ports. Instead, I only made it as far as drilling the holes for the ports in the side skins. Since I’m using the SafeAir static ports, I had to change the location slightly from that on the plans. My distance from the longeron rivet line remained the same at 2″ below the line, but I had to more the hole forward about a half-inch to accommodate the large flange on the SafeAir ports. Instead of 11/16ths forward of the bulkhead rivet line, I placed them at 1.25″ forward. Hopefully, this won’t introduce any error in my instruments that can’t be calibrated out. Once the locations were marked, I drilled and deburred 1/4″ holes. Installation of the ports will have to wait until I have the top skins off again.
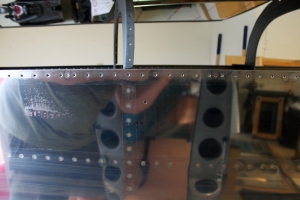
Since I’m using the SafeAir static ports, I had to move the port location slightly forward to accommodate the flange of the port. The center of the hole is 2″ down from the longeron rivet line, and 1.25″ forward of the vertical rivet line.
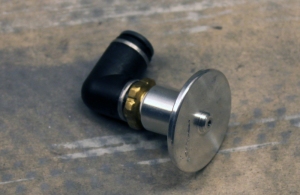
The SafeAir static ports with angled tubing adapter already attached. I wanted to install these today, but my pro-seal didn’t arrive from Van’s until after I had the top skins back on.
Since I wanted to keep working, rather than wait for my sealant, I clecoed the top skins back on. Right as I finished clecoing, FedEx showed up with the sealant. Since it took me about an hour to get the top skins back on, I decided to forge ahead, instead of taking the skins back off to install the static ports. On to the baggage bulkheads!
Before I could start working on the baggage bulkheads, I had to cleco in the aft baggage side covers and the baggage floors. With these in place, the baggage bulkhead could go in. The baggage bulkhead is split into upper and lower parts. The lower part has some pre-punched holes in it, and it can be clecoed to the corresponding holes on the lower section of the F-706 bulkhead. Once the lower part is clecoed, the sides can be match-drilled to the F-706 using the holes in the baggage bulkhead as guides. All of the holes are drilled for #8 screws. Eventually, the screws will be captured by nutplates installed on the aft side of the F-706 bulkhead.
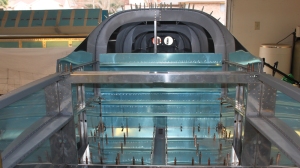
The lower baggage bulkhead is clecoed to the lower portion of the F-706 bulkhead, then the side are match-drilled.
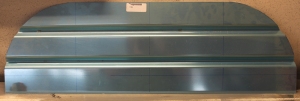
The top section of the baggage bulkhead is a bit more complicated. It comes as a rectangular pieces of corrugated aluminum sheet. The top of the sheet needs to have a couple of curves cut in it to match the curvature of the fuselage. Fortunately, the plans give very good details about the location and radii of the curves. The plans also give detailed measurements about where to drill additional holes for the screws that will attach the top section to the fuselage. Once everything was marked out, it was easy to cut the curves with my band saw. After cutting the top section, it was match-drilled to the F-706 bulkhead.
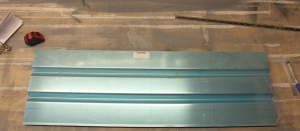
The upper baggage bulkhead has to have curves cut into the top. The plans are relatively clear about the location and radii of the curves. You probably can’t see my lines unless you click on the picture to zoom in.
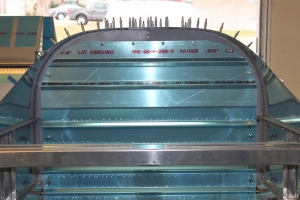
The upper baggage bulkhead is match-drilled to the F-706 bulkhead using hole location provided in the plans.
Next, I removed the top section of the bulkhead and cut two notches in it for the shoulder harness cable pass-throughs. Again, the plans had very clear locations for these, so they were simple to make.
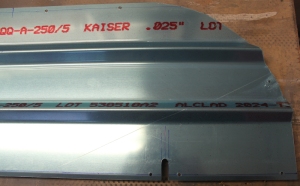
Two notches have to be cut into the upper baggage bulkhead to act as pass-throughs for the cables that connect the shoulder harnesses to the airframe. Again, the plans had very clear details for the location of these notches.
Finally, I fabricated the wear blocks for the shoulder harness cable pass-throughs. These are just pieces of plastic that prevent the shoulder harness cables from rubbing on the aluminum bulkhead. The hardest part about making these was finding the stock material. Eventually, I discovered it in a small bag inside the bag containing the shoulder harness cables (a logical place that should have been my starting point). Of course, this bag was buried on the bottom shelf of my workbench under several other bags and coils of tubing.
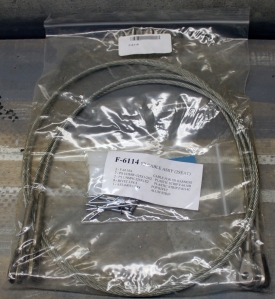
It took me awhile to find the parts for the wear blocks. They were in a small bag inside the seat belt cable bag, on the bottom shelf of my workbench, buried under a few other parts bags.
Once the parts were located, I made quick work of the fabrication. Several aluminum washers have to be made to give so that the rivets used to install the wear blocks will have better “grab” by having aluminum on both side instead of plastic. Rather than making aluminum washers, I’m going to use some aluminum rivet washers that I had purchased previously. Why do extra work when something you already have will work and look better! Two holes had to be drilled in each of the plastic blocks, and the larger blocks also had to have notches cut in them. Once all the parts were ready, I match-drilled them to the baggage bulkheads.
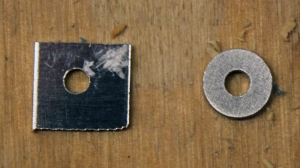
The wear block require 8 aluminum washers to be made from a strip of aluminum. I made them only to realize that I had some actual aluminum washers that would be perfect. It’s pretty obvious which one was made by me and which was made by a factory…I think I’ll use the factory-made washers!
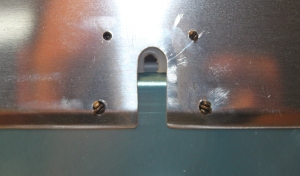
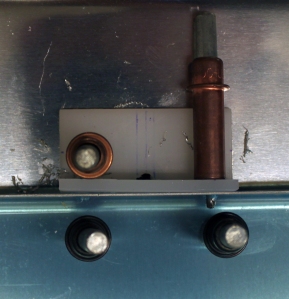
The wear blocks as seen from the font of the baggage bulkhead. At some point, these will be permanently installed with LP4-3 blind rivets.
Filed under: Aft Fuselage, Center Fuselage, Construction, Fuselage Tagged: aft fuselage, baggage bulkheads, center fuselage, F-706 bulkhead, fuselage, RV-7, shoulder harness wear blocks, static port, static system
